Carving a Triple Mobius Chinese style
Part one: Design
The Triple Mobius, first carved in jade by the great Donn Salt, is very popular in China. Like customers in the West, Chinese people like it made from a nice clean jade with a uniform colour and translucency. Unlike most Western customers they do not like it to be carved too thin. The design is important to them but their first concern is the quality and value of the jade. The finest jade is bought by the gram because it is so expensive. So the less jade that is removed the better. If you begin with 50gs of rough stone and end up with 30g of polished jade that is far better than ending up with 20g. The finished piece weighing 30g will have 50% more value than a pendant weighing 20g.
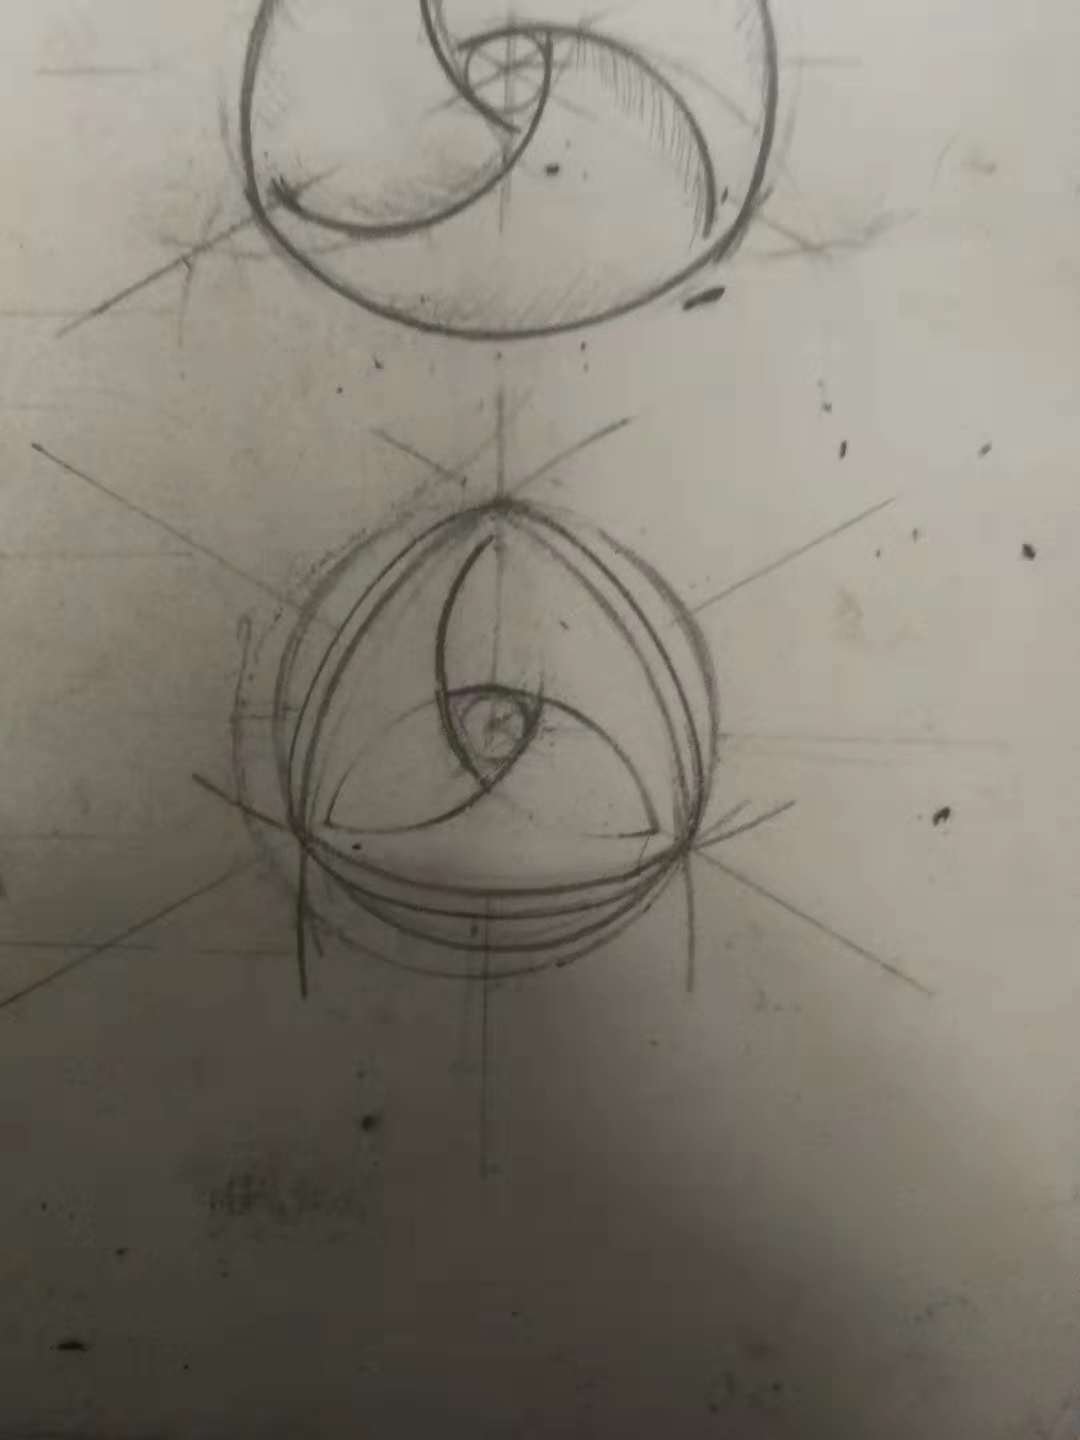
Part Two: Template
After I have drawn the design in my sketchbook I then create a template. For me a template is extremely simple. I just trace the outline of the Triple Mobius onto a piece of clear flexible plastic and cut out the shape with scissors and a craft knife.
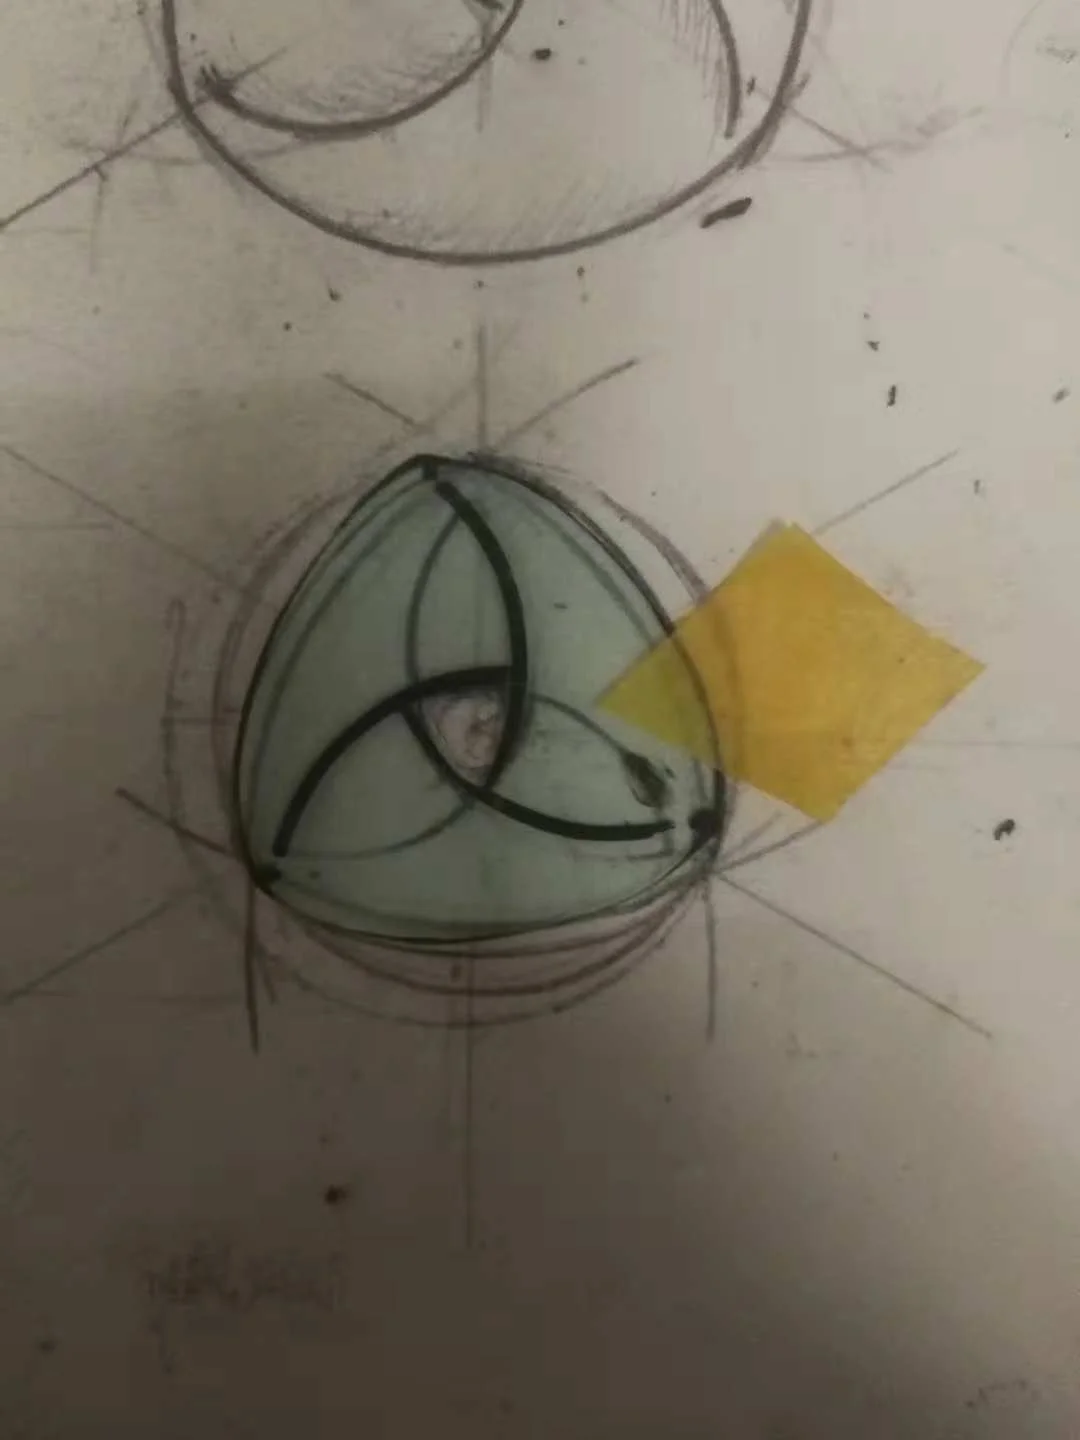
Part Three: Outlining the preform
When the template is ready I then place it on the piece of jade I am going to carve the Mobius from. Using a waterproof marker pen I then draw round the template on the jade itself. I rotate the template three times and draw round it each time. This is because the template is hand made so it is never 100% accurate. Each side is a tiny bit different. By rotating it and redrawing it evens out the differences.

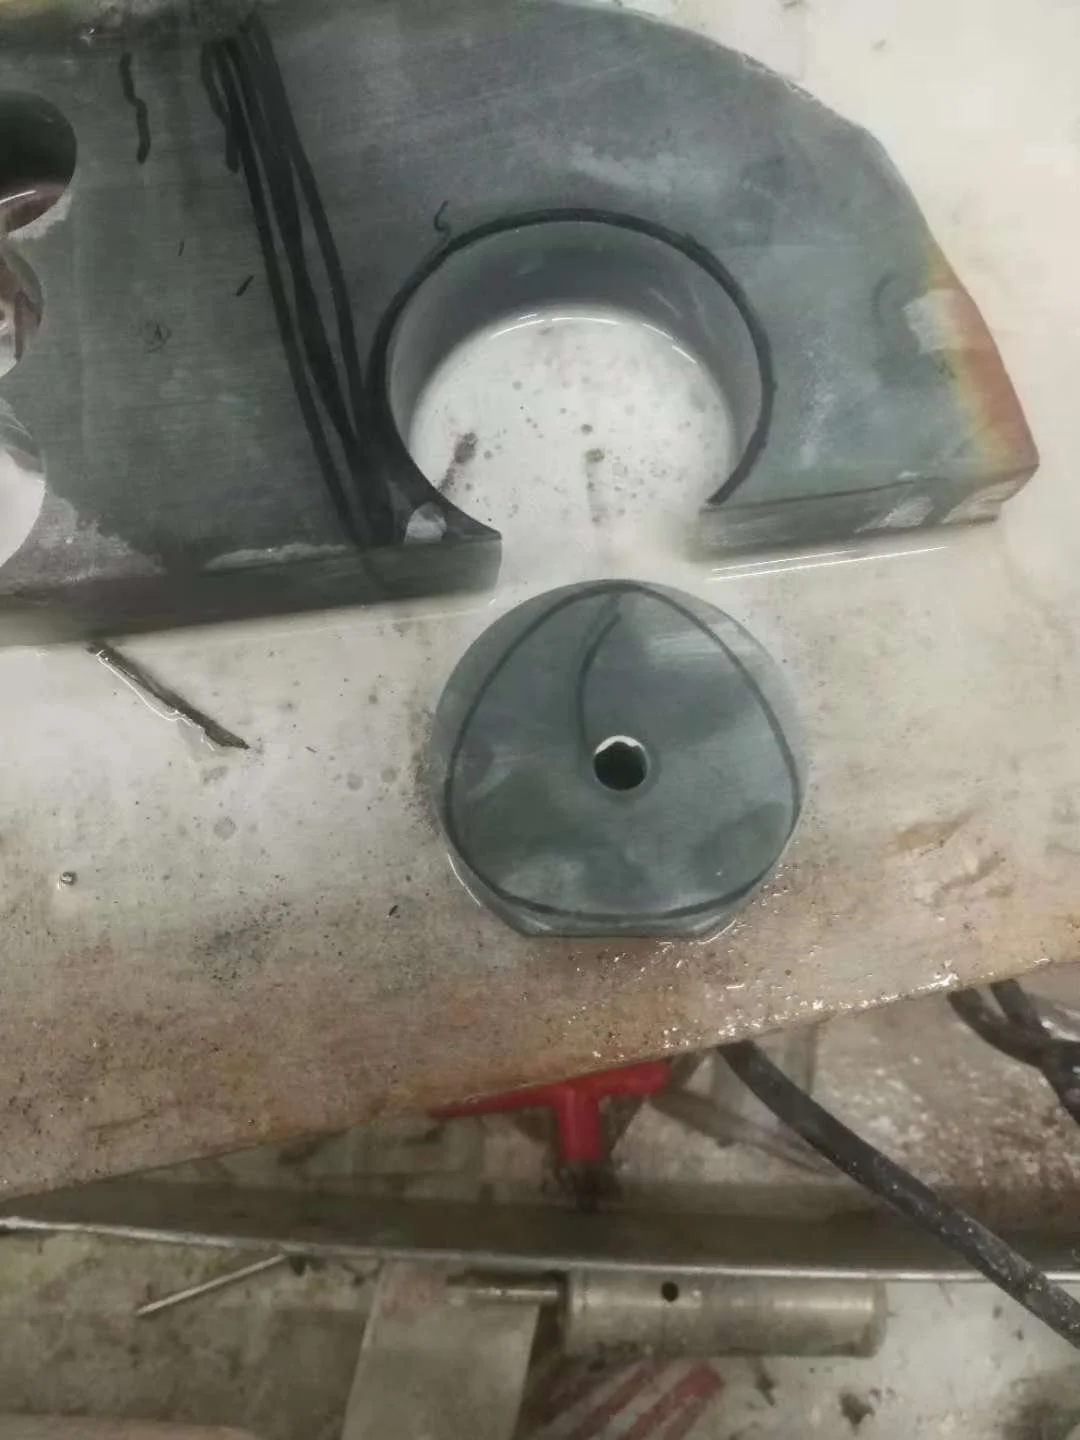
Part Four: Coring the jade
Some people use a saw to cut out a rough outline of the preform. I prefer to use a drill press to core the stone. So if I am crafting a 40mm mobius then I can use exactly the right size core drill for the jade. If I fix the rough jade securely I can also switch to a smaller core drill, without disturbing the stone I am working on, to create the central negative space in the mobius. The great advantage of this is I can make sure the central hole is in the exact centre of the piece. I end up with a very rough preform which then needs to be shaped using sintered wheels.
Part Five: Using sintered grinding wheels.
I use a 100 and a 225 wheel to shape the jade to the exact dimensions of the template. Then pick up the waterproof marker again to mark out where I next need to take away material.
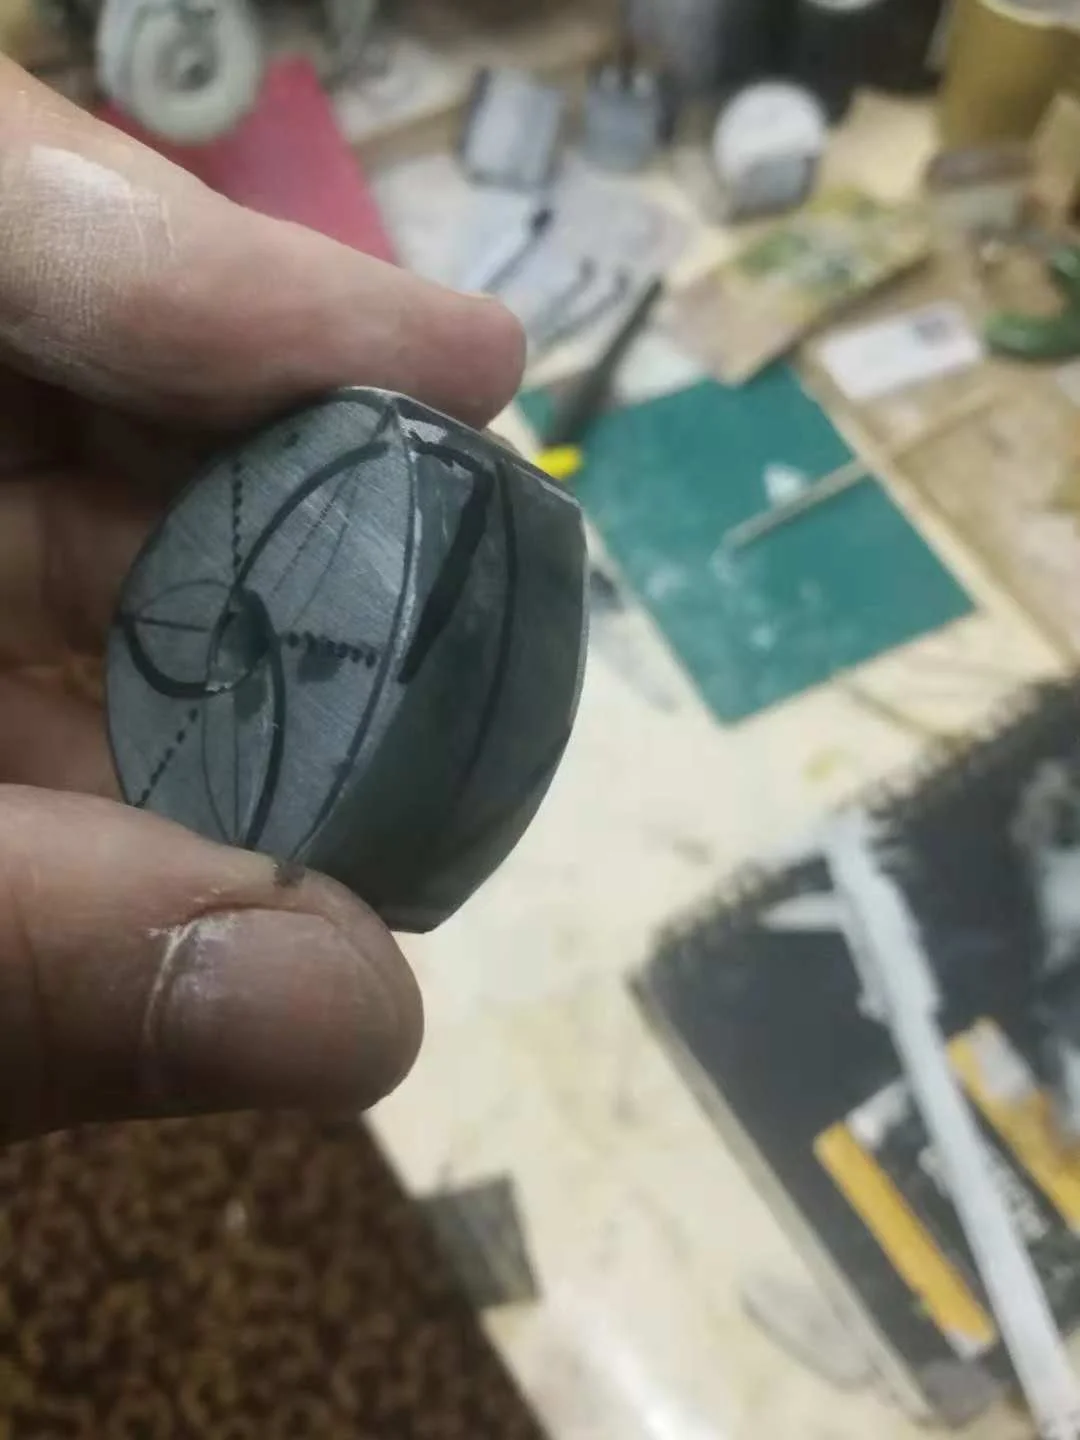
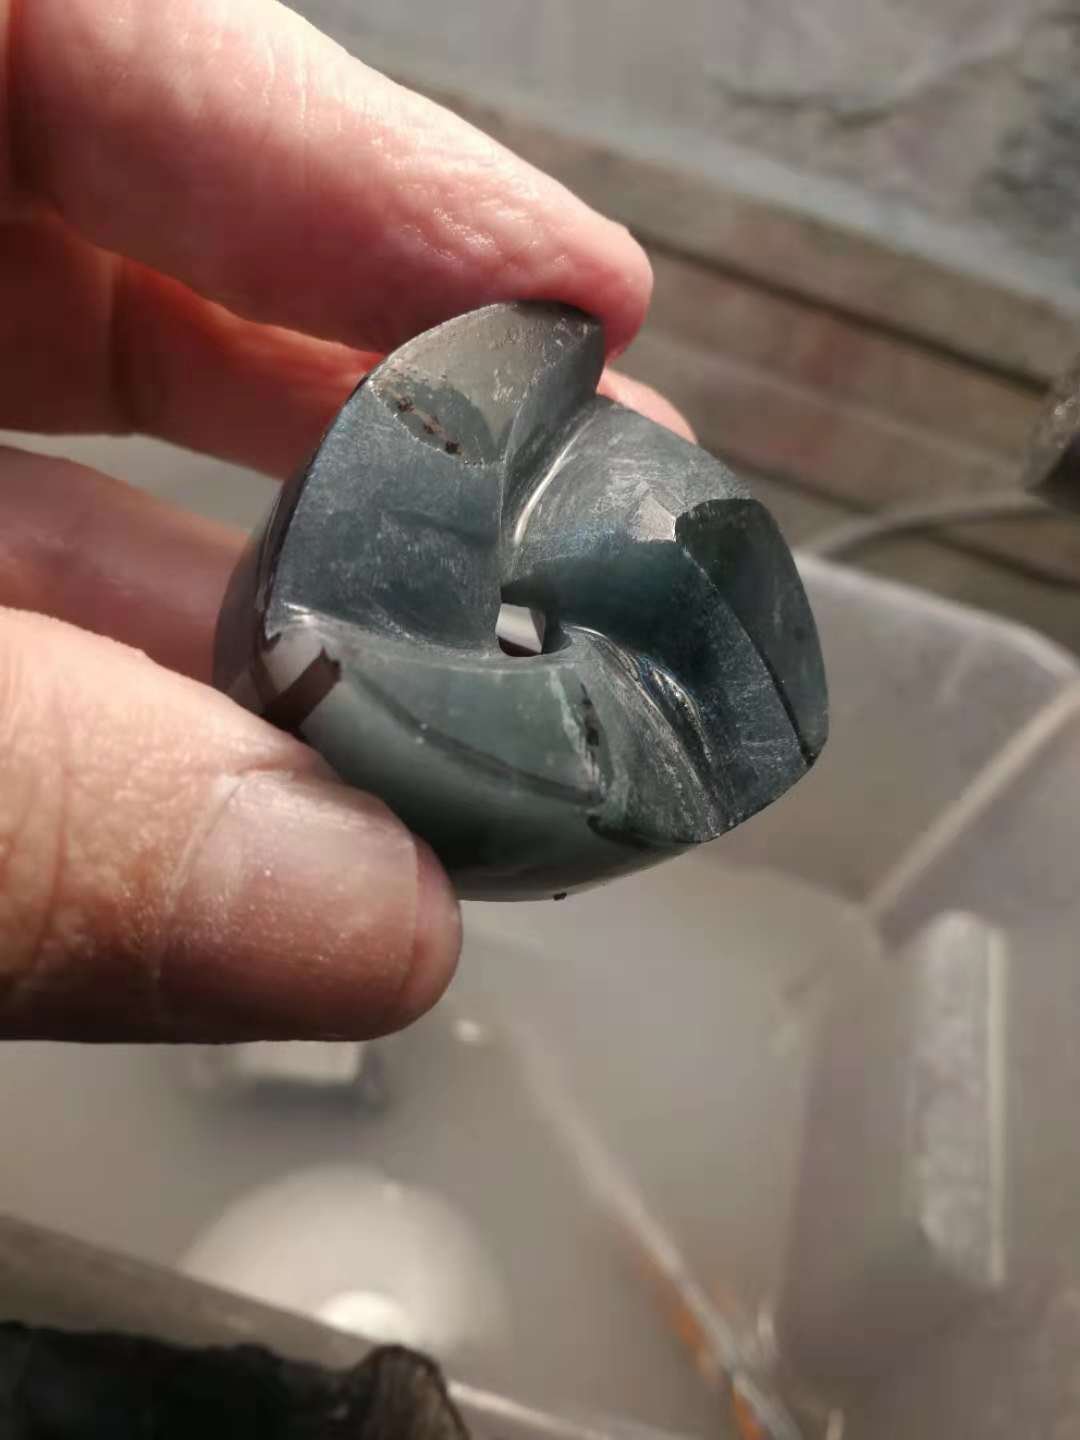
Part Six: The Point Carver
Having used core drills and sintered wheels to get the basic form I now move on to the point carver and smaller tools to start taking away material. In China they say that carving jade is 70% down to the tools used and 30% down to the skill of the carver. I agree with this and save a lot of time by sourcing exactly the right tool. For the inside curves of the mobius, for example, I use a large burr which has the same shape as the inside curves.
Part Seven: Refining the shape.
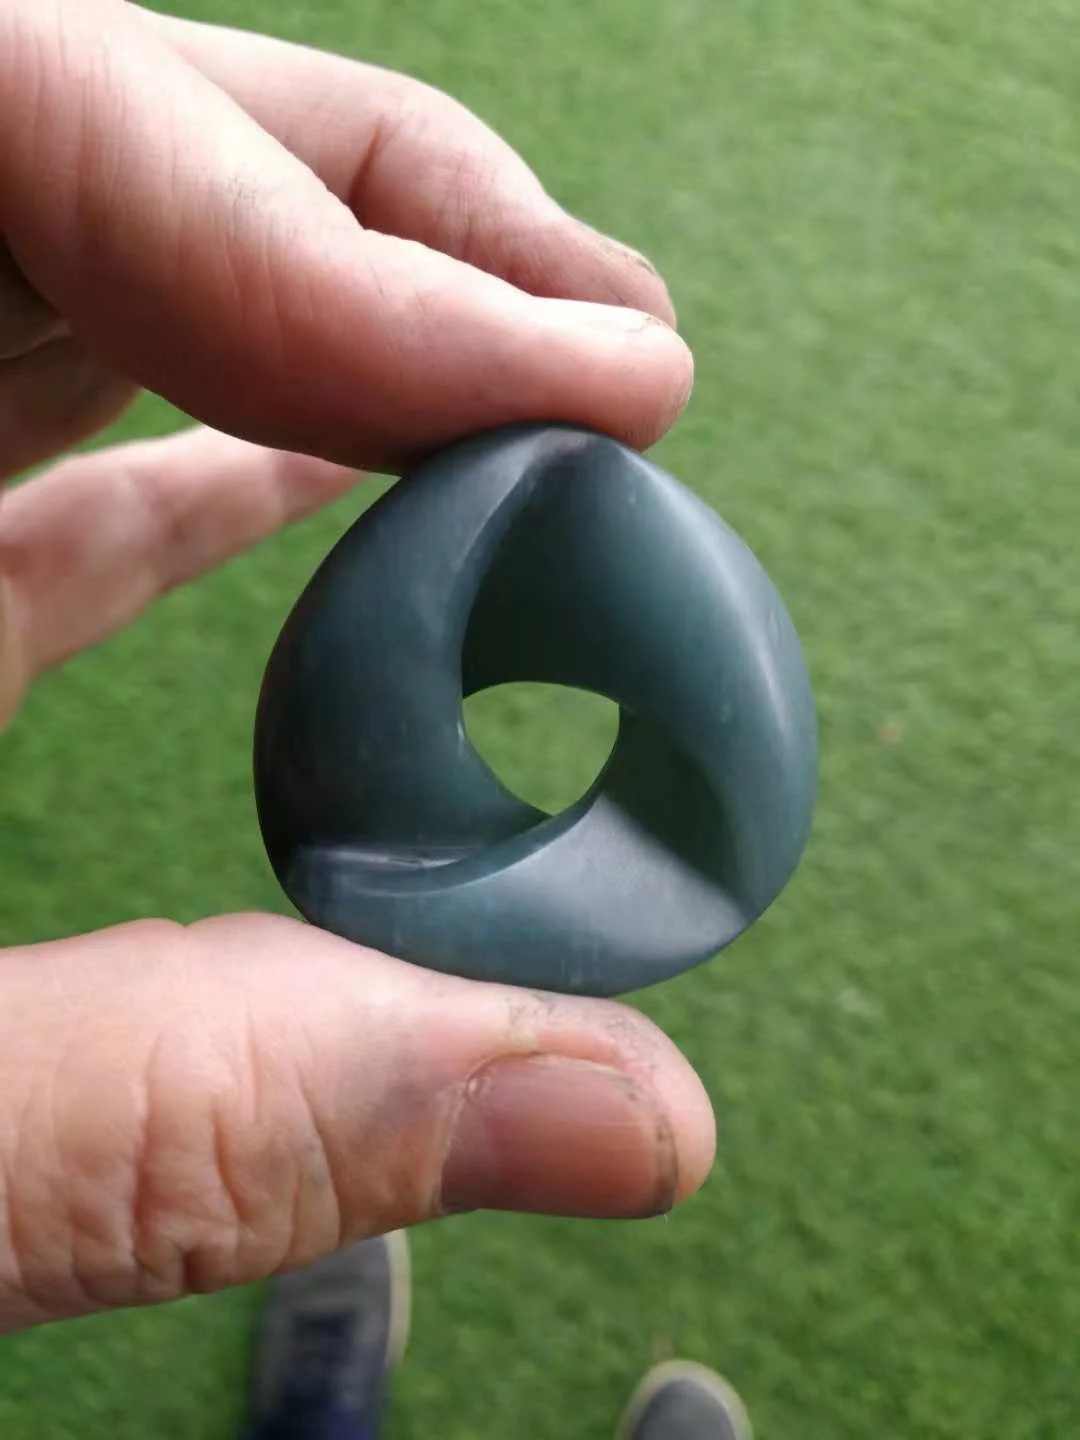
Now I have the rough shape of the mobius on my bench it is time to start smoothing the curves. This is a gradual process of abrasion and constant redrawing. I go back the sintered wheels, then on to big burrs for the larger smoother surfaces and ever small burrs attached to the equivalent of dentists drills to get the shape and the proportions right. Jade is a very forgiving stone but a Triple Mobius to look right has to have the right size negative space and three equal sides.
Part Eight. Sanding
Once I have the shape I want it is time to start sanding the jade. I use a combination of sanding drums, silicon carbide sanding sticks, diamond powder mixed with vaseline, and diamond paper. The combination I use depends on the jade. This mobius is made from a good quality Guatemalan jadeite so I got rid of most of the tool marks by using a combination of 240/400/600 sanding sticks and sanding drums. I then went back over it with 600 grit diamond powder and diamond paper. This seems to be far coarser than 600 grit sanding sticks and helps smooth the jade even further. I then go over the whole thing with 1000grit diamond powder.
Part Nine: Double checking
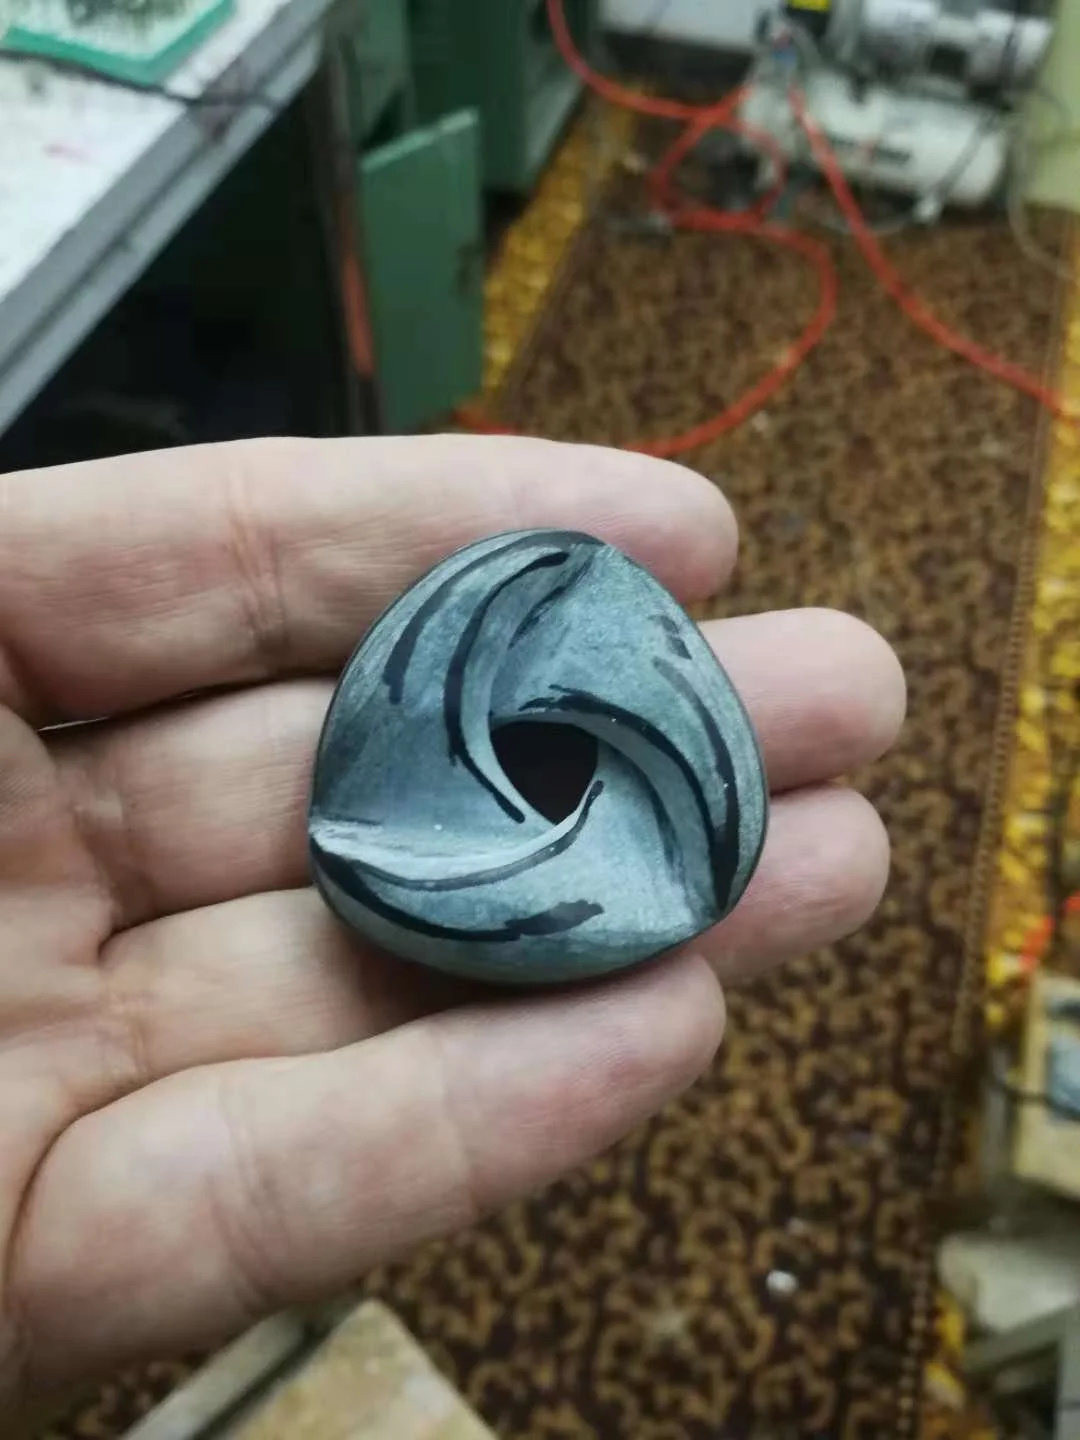
When I am reasonably happy that the tool marks are out and the jade is ready for polishing I double check by mixing a combination of 400 and 600 grit silicon carbide powder with a little olive oil and rub it deep into the jade with the suede side of a piece of leather.I find this helps identify any bumps and divots I have missed. As you can see from this photo its a very necessary part of the process for me. In this case it has highlighted some places I haven’t dealt with properly. I like to use this process because it saves discovering these flaws after polishing which means having to start the sanding and polishing process all over again.
Part Ten: Double double checking
I go back over it again with very fine burrs and get rid of the bumps and divots the last process has revealed. I then double check I am on course to start polishing by again using the 400/600 grit mixture rubbed into the jade with the suede leather. It is only then I consider it ready for polishing.

Part Eleven: Stringing
Before polishing I take a very small pointed burr to drill a hole with two openings into the top of the mobius so that it can be strung and worn as a pendant. This is different from the western style, where the holes are usually drilled through the side. I find this makes the pendant hang awkwardly and ten to roam across the chest of the wearer.

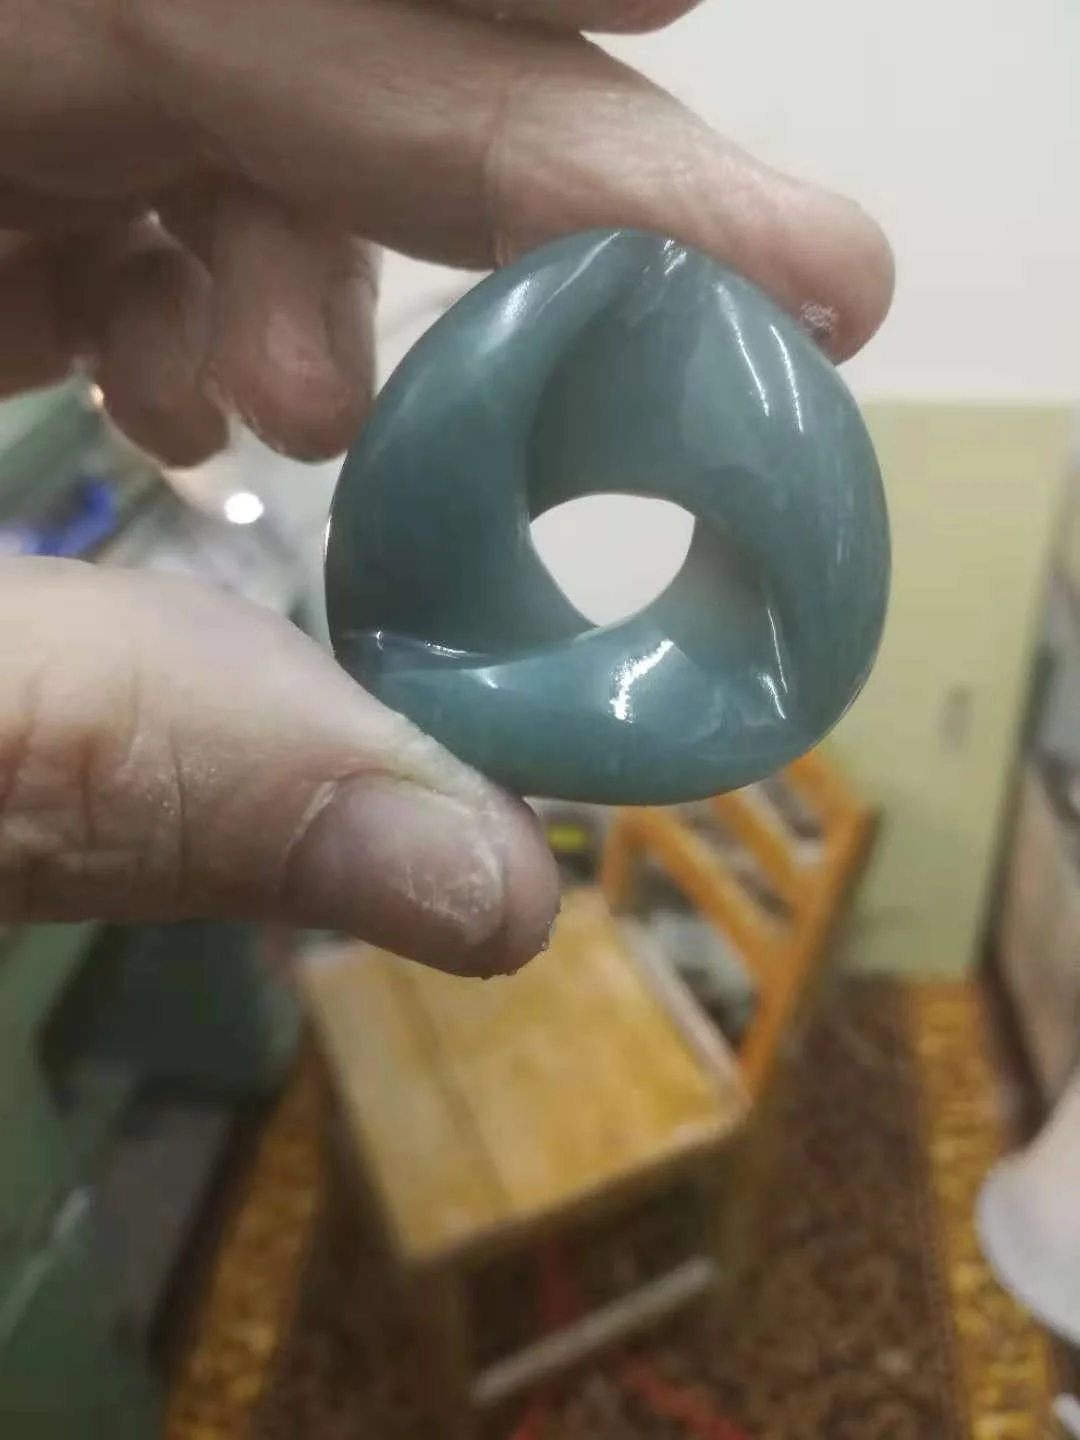
Part Twelve: Polishing
I use a polishing compound specifically made for jade. A small tub costs about $US8 and lasts me a couple of years. I apply the polish with a variety of leather wheels of different sizes and shapes and finish with felt bobs and circular nylon brushes (that look like tiny versions of the ones that were used to sweep chimneys in the 19th and 20th centuries). These can reach into the tiniest corners of the jade.

Finale: Display
I love carving but I need to sell my work. At my gallery I try to take great care to show my jades in the best possible way. Also, more and more customers are now buying online so a good photo is essential. I don’t mean using software to enhance colour but I do try to take my pictures in a way that shows the my work in the best light.
