How to Carve a Jade Bangle
Step One.
Finding a piece of white jade to make a flawless bangle is not easy. While there is a lot of white jade around, good quality stone is rare and very expensive. You need a large enough piece of jade which is consistent in colour and with a tight enough grain so that when it is carved, sanded and polished it does not look too translucent or too opaque.
A half kilo stone of the best Hetian river jade large enough to make a bangle will cost more than $50,000 USD. It is almost impossible to find a stone like this. Usually a larger stone has to be bought at even greater cost and a piece cut from it to make the bangle.
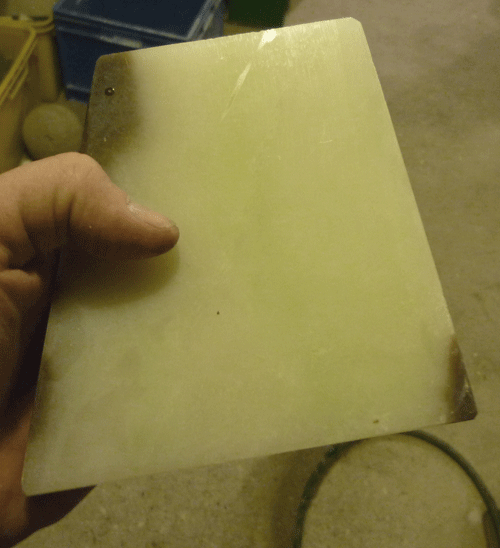
This is way beyond my budget, so I chose a piece of white Siberian jade which I believe is a purer white than Hetian jade but the price is more realistic because it does not come from the mystic home of jade: Hetian, in China’s Xinjiang province.
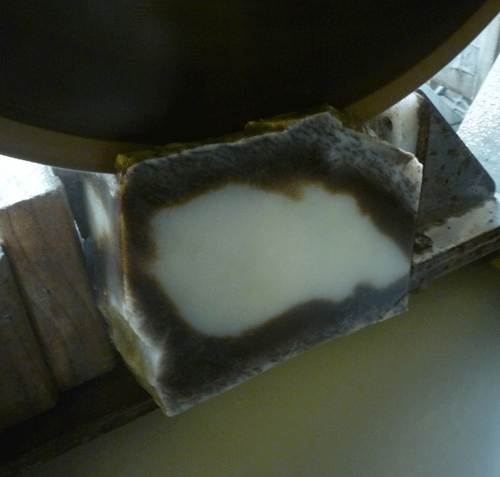
The slab I acquired was cut from a larger stone. It took a whole day to find a slab good enough for the bangle.
Step Two
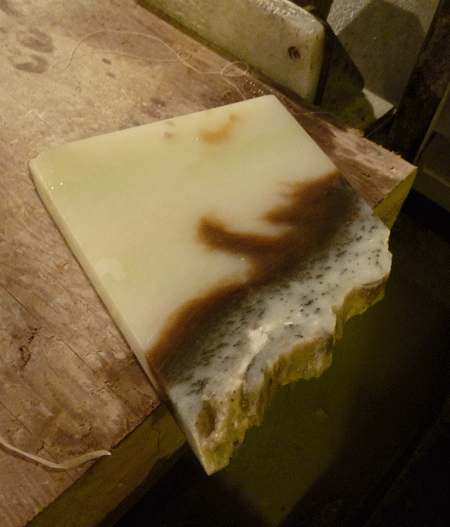
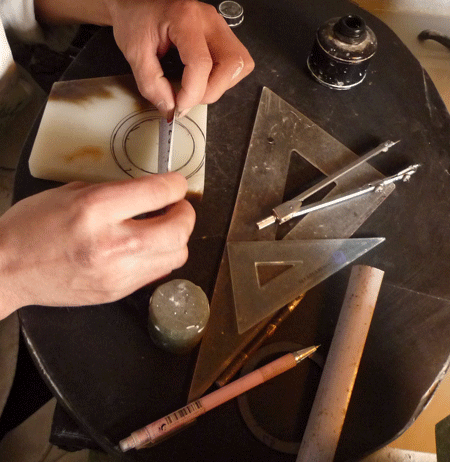
Once the slab had been cut from the larger boulder I made a minute examination of it to make sure the jade was good enough to make a bangle of the highest quality. I needed to check that I could fashion a bangle without using any of the brown rind or skin of the stone. After using a set square and ruler I believed that the white flesh of the stone was just large enough.
A huge bonus was that after it had been cut I could see a faint wave of apple green, almost invisible to the naked eye, which ran through the centre of the stone. I had seen this in only one or two white jade bangles before.
Once the bangle had been sanded and polished it would add considerably to its beauty (and value) even though it was so subtle as to be hardly noticeable.
Step Three
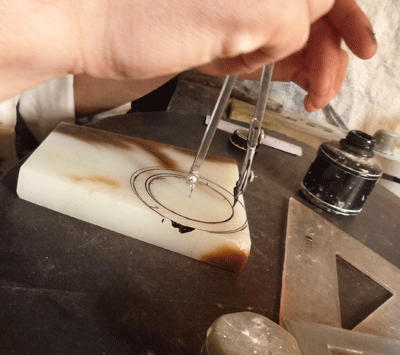
The next stage was to cut away the ugly outer rind. The solid and consistent root beer coloured skin could stay. Once the bangle shape had been carved the excess stone and the rind could be used to fashion other jade articles.
After trimming I was left with a piece of white Siberian jade weighing about 750 grams from which I believed I could fashion a bangle and still have three substantial pieces of jade left over.
Step Four
Design. The next stage in the process was to decide which piece of the stone the bangle should be cut from. If I chose correctly then enough large pieces would be left over to carve some decent sized pendants which would make me some money.
Step Five
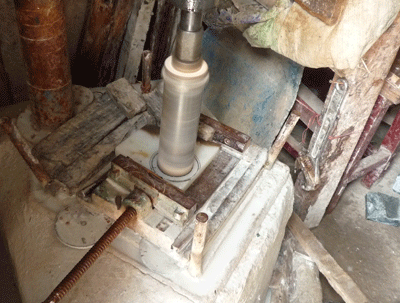
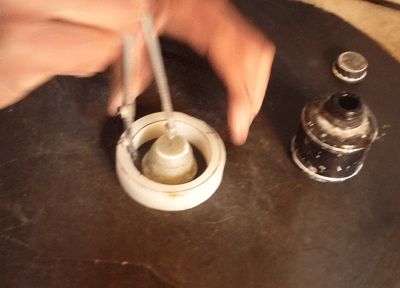
The Drill Press. The first piece of equipment that is necessary to make a bangle is a drill press. Two different size core drills are also needed to cut out the bangle’s basic shape . One core drill is used to cut out the hole in the centre of the bangle the other is used to cut the outside shape.
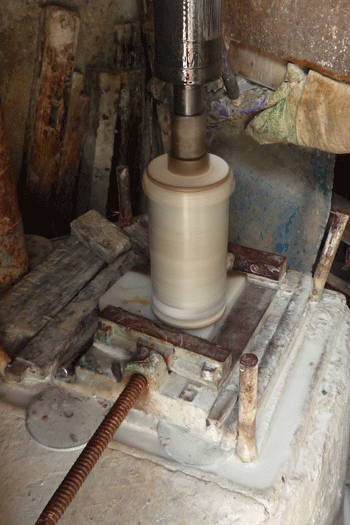
Step Six
Outlining. The slab of jade from which the bangle is to be cut is placed in the drill press. Blocks of wood are used to wedge the slab in place. The smaller core drill is used to define where the central hole is to be cored from. It is used to cut only a few millimetres into the jade. Then it is replaced with a larger core drill which also cuts only a few millimetres into the stone. This is to define the shape.
Step Seven
Trimming. The slab is then removed from the drill press and a small saw is used to trim the excess jade from the outside of the bangle. White jade is so valuable that great care is taken when trimming the stone. Large pieces of good jade are far more valuable than small pieces so every effort is made to make sure the pieces removed from the outside are as large as possible but even the small shards are kept to make beads.
Step Eight
Once the slab has been trimmed into a roughly even shape it is then placed back in the drill press and the two core drills are used again. One of the reasons for doing it this way is that the more even shape of the trimmed slab, the easier it is to wedge the jade into place. This time the core drills cut deeper into the stone. They stop cutting only millimetres short of shearing completely through to the metal plate on which it rests.
Step Nine
Final Trimming and Coring. The jade is then taken off the drill press and back to the point carver. The small saw is used to cut off any remaining excess material on the outside of the bangle. Then a small burr is used to cut the core out of the centre. This is done very carefully and with great precision. As the stone has been cut nearly all the way through while coring this is quite a quick process. One of the reasons why the core drill doesn’t cut all the way through the stone at first is to lessen the chance of the jade being chipped or damaged when the metal blade of the core drill hits the metal shelf on which the jade is resting.
Step Ten
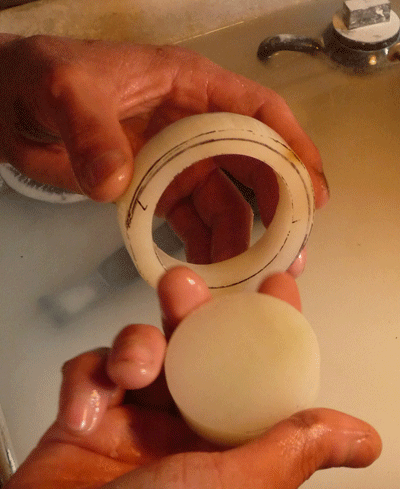
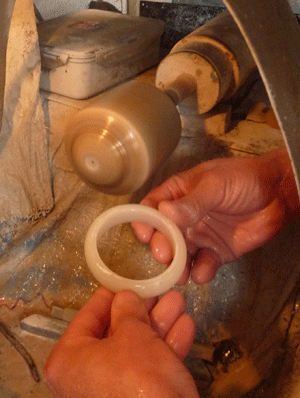
The Blank. For the first time in this process the shape of the bangle begins to emerge. The stage we have reached now is what is sometimes referred to as the “blank”. This is the basic shape from which the jade bangle is to be fashioned. From this point on it is all about precise measurement and detail.
Step Eleven
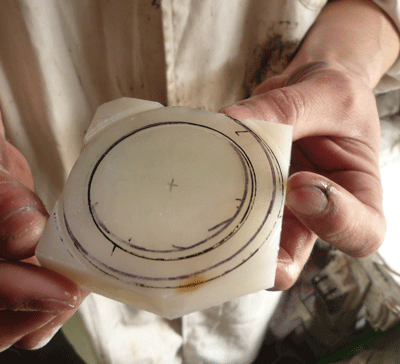
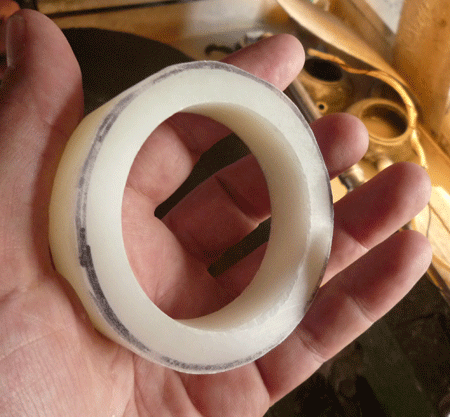
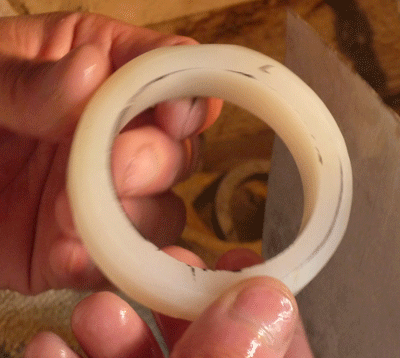
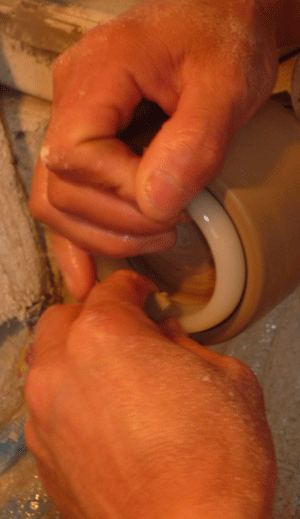
Curvature. The next stage involves putting a curved surface on the bangle. First a circular line is inked onto the jade . Then the small saw is again used to slice off slivers of jade following the line that has been inked on to the stone. Then the jade is examined to make sure the shape is still even. Precise measurements are taken. This process is repeated two or three times. Each time the shape of the bangle is subtly changed. It slowly takes on a rough but even curved shape.
Step Twelve
Sanding the outside of the bangle. The bangle is pushed onto this special wood and rubber drum which spins at 1000+rpm. The bangle is stopped from flying off the drum as it spins by pushing 240 grit sanding sticks against the jade from above and below This process further smooths and shapes the bangle. The same process is repeated with 325 grit sanding sticks. During this operation the bangle must be constantly measured to make sure it keeps an even shape.
fig 1
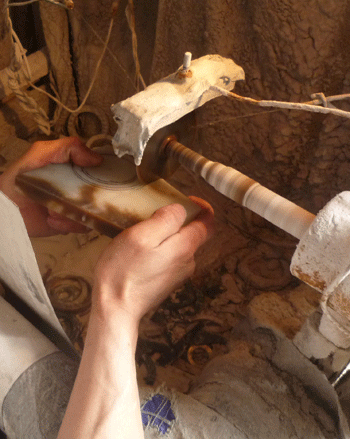
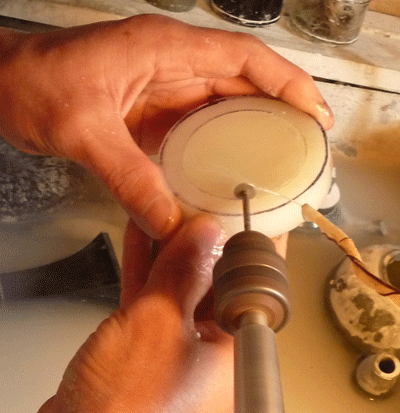
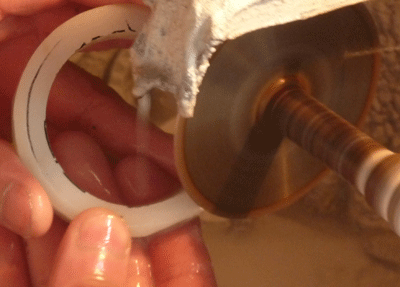
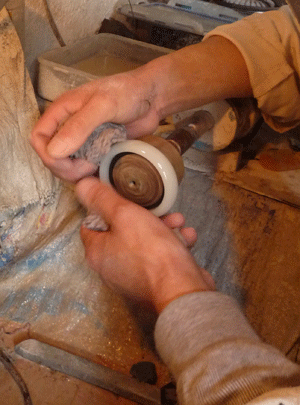
Step Thirteen
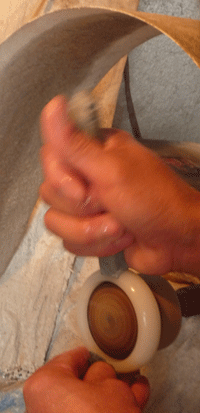
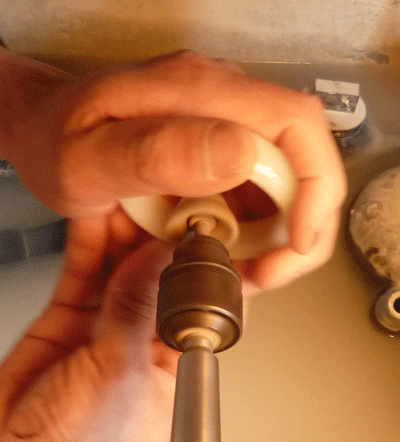
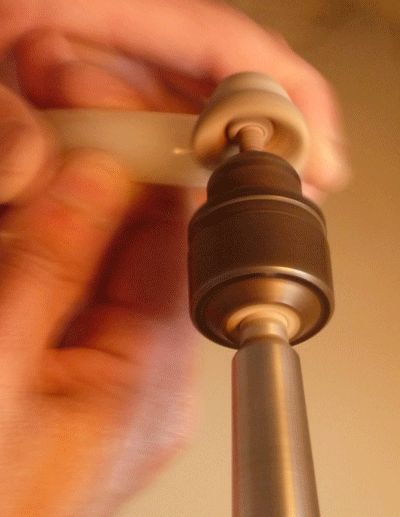
Sanding the Rim. A different wooden drum is used to sand the rim of the bangle (fig 1). This drum is spun at high speed while the bangle is pushed against it. Both inner rims of the bangle are smoothed in this way. It takes some strength to hold the bangle steady (fig 2). If it flies off and chips the whole process might have to begin again.
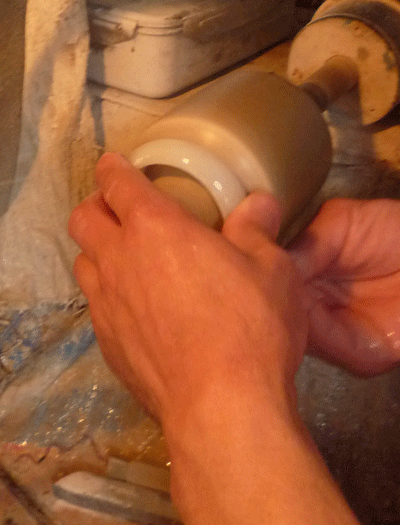
fig 2
Step Fourteen
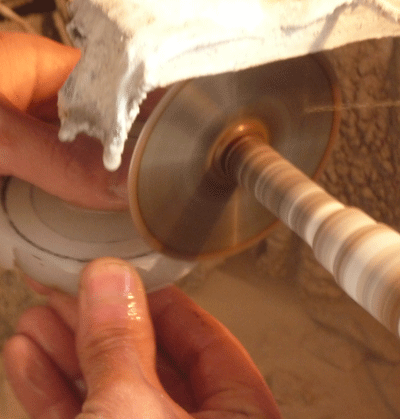
Yet another special drum is used for sanding the inside of the bangle. The same method is used as before with the drum spinning on a carving point. This time the jade is pushed into the drum to hold it steady . Sanding sticks of 240 and 325 grit are used to smooth and shape the inside.
Step Fifteen
The three drums used to sand the outside, inside and rim of the bangle are also used in the first stage of polishing. Instead of sanding sticks, rags soaked with a fine carbide grit are used to smooth the jade further. it is best to use old rags and have been used to polish many bangles. After using them the bangle begins to glow and the true beauty of the stone begins to show.
Step Sixteen
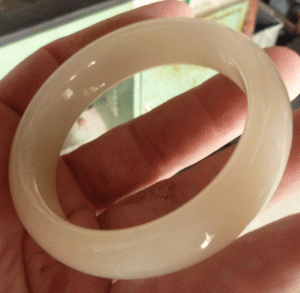
The final polish. A well worn hard felt bob is attached to the carving point. A very diluted diamond polishing powder is sparingly applied to the bob and to the bangle. The same felt bob is used to polish the inside, outside and rim of the bangle. The felt bob should spin at a fast enough speed to make the bangle uncomfortably hot to touch.
Step Seventeen
Cooking the Bangle. After the final polish the bangle has an even more beautiful lustre ) It then needs to be dipped in a rice cooker filled with hot liquid wax for a few minutes. This gives it a coating to protect it from damage. This technique is often used on inferior jades but left in the hot wax for several hours to let the wax seep into the stone and hide the flaws within. This is not necessary with good jade.
Step Eighteen
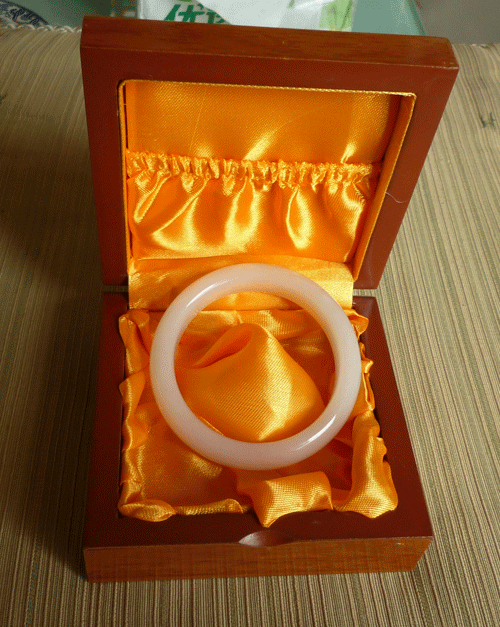
The final touch is presentation. It doesn't matter how good the jade is, it has to be noticed. I used a beautiful satin lined wooden box to showcase this bangle.
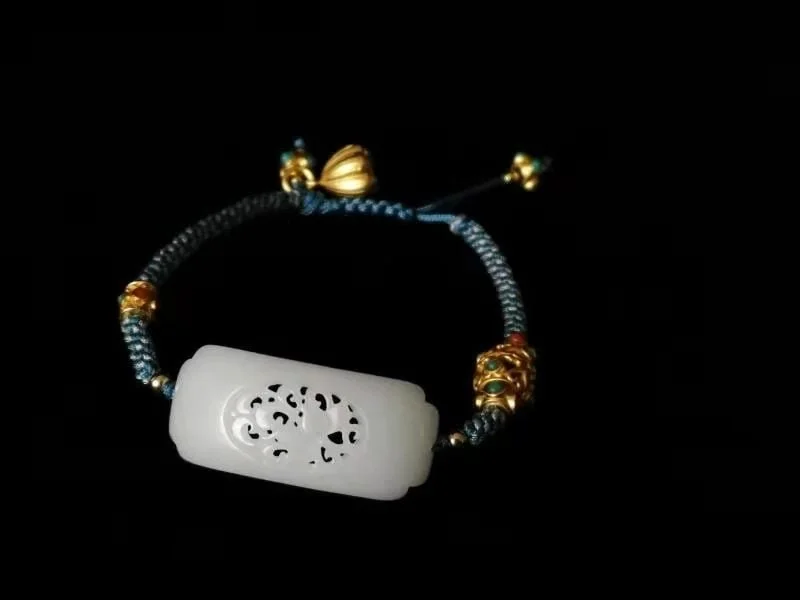
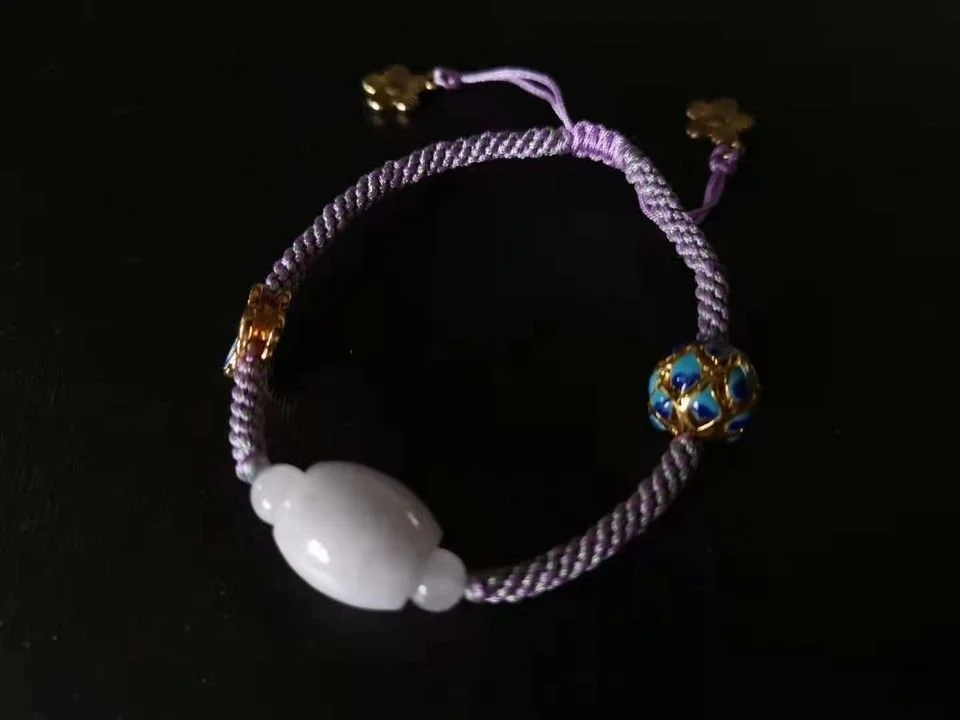
A selection of adjustable Jade Bracelets available in the Jade Fiend Store. All braided with silk and adorned with silver and gold